Showing posts with label in. Show all posts
Showing posts with label in. Show all posts
Monday, March 24, 2014
Reflections How to Show a Documents Reading Level in Word!
Before I write up todays technology Tuesday post, I want to take a moment to reflect on life in general. As many of you know, I lost my Grandma Vicky less than two weeks ago. I spent a lot of time reflecting on our time together and I can truly say that I was fortunate to have such a loving grandmother who was and is such an important part of my life.
I truly miss her more than words can say.

A week after finding out that my Grandma passed, I found out that my ex-boyfriend had passed as well. He was only 25. Though he and I grew apart and havent spoken for years, I truly wished only the best for him. He was my first "love" and he has always had a special place in my heart. As much as I was left speechless by my Grandmas death, I am having just as hard of a time finding the words to express my deepest sympathies and regrets for his death as well.
I truly believe that everything happens for a reason, but I can never find or explain the reasons why we have to lose the ones we love. It truly breaks your heart and makes you question the world. Ive honestly felt like nothing has been going right lately. As hard as it is, I keep reminding myself of something my mom told me once:

As hard as it is to cope with lose and to cope with change, I know I am fortunate for the relationships that I have had and that there are so many more who are going through worse. As hard as things are to cope with or manage, we somehow need to put one foot in front of the other and try to move on. To the same idea, I found this other quote on pinterest and I really like it:

The past week and a half, I have spent a good amount of time crying and a lot of time reminiscing. Fortunately Im surrounded by supportive family, friends, neighbors, co-workers and followers who have put up with my distance and my ramblings. So for now, my rambling will cease for the time being and Ill put one foot in front of the other. Perhaps getting myself back on track with my blog and my life will help ease the pain.
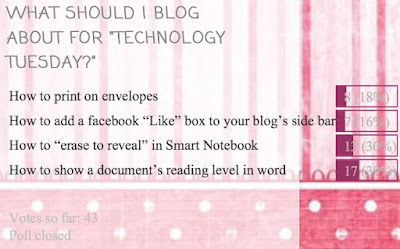
This two week long poll had a lot of votes, and the winner was the most recent addition to the poll... how to find out a Microsoft Word documents reading level. This tutorial is actually SUPER EASY!!!

Here are the official poll results...
And here is the incredibly easy tutorial!!!


As for next weeks poll, Ill be adding a blogger tutorial: how to host a linky party!
Read More..
I truly miss her more than words can say.
A week after finding out that my Grandma passed, I found out that my ex-boyfriend had passed as well. He was only 25. Though he and I grew apart and havent spoken for years, I truly wished only the best for him. He was my first "love" and he has always had a special place in my heart. As much as I was left speechless by my Grandmas death, I am having just as hard of a time finding the words to express my deepest sympathies and regrets for his death as well.
I truly believe that everything happens for a reason, but I can never find or explain the reasons why we have to lose the ones we love. It truly breaks your heart and makes you question the world. Ive honestly felt like nothing has been going right lately. As hard as it is, I keep reminding myself of something my mom told me once:
As hard as it is to cope with lose and to cope with change, I know I am fortunate for the relationships that I have had and that there are so many more who are going through worse. As hard as things are to cope with or manage, we somehow need to put one foot in front of the other and try to move on. To the same idea, I found this other quote on pinterest and I really like it:
The past week and a half, I have spent a good amount of time crying and a lot of time reminiscing. Fortunately Im surrounded by supportive family, friends, neighbors, co-workers and followers who have put up with my distance and my ramblings. So for now, my rambling will cease for the time being and Ill put one foot in front of the other. Perhaps getting myself back on track with my blog and my life will help ease the pain.
This two week long poll had a lot of votes, and the winner was the most recent addition to the poll... how to find out a Microsoft Word documents reading level. This tutorial is actually SUPER EASY!!!
Here are the official poll results...
And here is the incredibly easy tutorial!!!
You can download this tutorial as a PDF by clicking this picture!
Note: This tutorial is hosted on Google Docs. To save it from there, just open the file and click File > Download to save onto your computer!
As for next weeks poll, Ill be adding a blogger tutorial: how to host a linky party!

Sunday, March 23, 2014
How to Create a Folder Without Name in Windows XP just for fun
Hey friends i am writing a trick to create a folder with no name in windows operating system. This is not a super high-tech trick but it just a short and simple for fun or to amaze your friends.
simply it is like change from
 TO

Lets make this trick some more interesting....
How if we make ur folder or file invisible with only name? With below steps, the file is invisible because we are not hiding it, we are just give it a transparent icon and a space at its name, but someone can select it if they know where it is in desktop or any folder.

If you want to make its name invisible too then repeat the first trick ( Press ALT+0160 ).
simply it is like change from
TO - Create a new folder in your specified directory.
- Now rename the folder or file by pressing F2 key or Right Click -> Rename.
- Now hold ALT button and press 0160 ( or 255).
- Hit Enter then you are successfully creating a folder without name in Windows XP.
Lets make this trick some more interesting....
How if we make ur folder or file invisible with only name? With below steps, the file is invisible because we are not hiding it, we are just give it a transparent icon and a space at its name, but someone can select it if they know where it is in desktop or any folder.
- Create a new folder in your specified directory.
- Right Click -> New -> Folder, and a new folder will be created in that directory.
- Customize the folder if you want to. Dont rename. Right Click the New Folder, go to Properties, then to Customize, and then click Change Icon. Here is the trick, go to the middle and you should see some blank spaces. Those are transparent icons, select one of those then press OK -> Apply -> OK.
You should have finished your new invisible file, Congratulations

If you want to make its name invisible too then repeat the first trick ( Press ALT+0160 ).
Wednesday, March 19, 2014
How to Recolor an Image in PowerPoint
This weeks poll had a clear cut winner... how to recolor an image in PowerPoint!

I actually wrote this tutorial months ago (back in March 2013, yikes!) for my TPT book "How to Make a Cute Cover Page for Teachers Pay Teachers." This item organizes some of my most important tutorials in a way that is easy to follow and prints perfectly on letter paper. If you like this tutorial or my other tutorials, be sure to check out this product on TPT!

Anyway, onto the poll!


For next weeks tutorial, Ill be adding "How to Create a One Page Folding Book" to the poll (just like the one below). Be sure to vote!


Read More..
I actually wrote this tutorial months ago (back in March 2013, yikes!) for my TPT book "How to Make a Cute Cover Page for Teachers Pay Teachers." This item organizes some of my most important tutorials in a way that is easy to follow and prints perfectly on letter paper. If you like this tutorial or my other tutorials, be sure to check out this product on TPT!
Anyway, onto the poll!
If you have an older version of PowerPoint or are looking for more color customization options, be sure to check out the tutorial below:
You can download this tutorial as a PDF by clicking this picture!
Note: This tutorial is hosted on Google Drive. To save it from there, just open the file and click File > Download to save onto your computer!
For next weeks tutorial, Ill be adding "How to Create a One Page Folding Book" to the poll (just like the one below). Be sure to vote!
Monday, March 17, 2014
How to Make Your Fonts Look Fancy in PowerPoint
I am just in love with the font options in PowerPoint! I used to do so many of these things in Photoshop, but doing it in PowerPoint makes it so much easier!

This was a definite winner on the poll!

For those of you who saw my previous tutorial on placing a pattern over your text, you can add these options on top of the pattern to make your font extra special! You can view that previous tutorial below:

Now... onto the tutorial!


You can download this tutorial as a PDF by clicking this picture!
As for next weeks poll, Im going to add a question that so many people often ask... how can I find "royalty-free" clipart, pictures, and textures for free? Be sure to vote for your favorite choice on the poll!
Read More..
This was a definite winner on the poll!
For those of you who saw my previous tutorial on placing a pattern over your text, you can add these options on top of the pattern to make your font extra special! You can view that previous tutorial below:
Now... onto the tutorial!
You can download this tutorial as a PDF by clicking this picture!
Note: This tutorial is hosted on Google Docs. To save it from there, just open the file and click File > Download to save onto your computer!
As for next weeks poll, Im going to add a question that so many people often ask... how can I find "royalty-free" clipart, pictures, and textures for free? Be sure to vote for your favorite choice on the poll!
Zoom In Or Out Easily!!!
I never realized how much I use this weeks technology tip until the scroll button on my mouse stopped working today and I couldnt do it!!!
This tip lets you zoom in/out on a document or a website so easily. It works in PowerPoint, Word, Firefox, Internet Explorer, Preview, Adobe Reader... and so many more!!!

Read More..
This tip lets you zoom in/out on a document or a website so easily. It works in PowerPoint, Word, Firefox, Internet Explorer, Preview, Adobe Reader... and so many more!!!
Try it now and see how you like it!!!!
Sunday, March 16, 2014
How to Make a Frame in PowerPoint
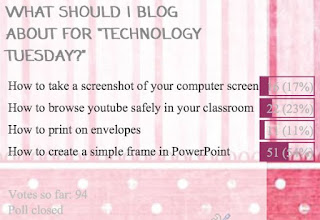
Are you looking for a way to make your TPT cover page more colorful? Or to make a bright visual for your classroom? Well... its much easier than you might think! For this weeks Technology Tuesday (and I say Tuesday loosely as its almost midnight... eek!), the winner was how to make your own frame in powerpoint!



And of course, heres the frame that I made as a freebie!
To save the files, just click the image to get to the higher quality picture, then right click (or Mac: Ctrl + Click) to save the image onto your computer!

Next week, Im going to add how to make a collage of words in any shape you want!

Read More..
This item won the poll by a large margin, but it does seem that some of the other options are becoming strong competitors! I cant wait to see what happens on next weeks poll!
Now, without further adieu...
You can download this tutorial as a PDF by clicking this picture!
Note: This tutorial is hosted on Google Docs. To save it from there, just open the file and click File > Download to save onto your computer!
And of course, heres the frame that I made as a freebie!
To save the files, just click the image to get to the higher quality picture, then right click (or Mac: Ctrl + Click) to save the image onto your computer!
Next week, Im going to add how to make a collage of words in any shape you want!
Saturday, March 15, 2014
How to Embed a Video in Smart Notebook!
Its Tuesday again, and I am shockingly writing this post before the stroke of midnight! :) The winner of this weeks poll was how to embed a video in Smart Notebook!

Heres the poll for anyone interested!


Dont you just love when theyre short and sweet?
Note: This tutorial is hosted on Google Docs. To save it from there, just open the file and click File > Download to save onto your computer!
I do plan on adding some other Smart Notebook Tutorials in the future, but in the meantime I want to add a Microsoft Word/PowerPoint option... how to make any font into an outline!

Read More..
Heres the poll for anyone interested!
Now, onto the tutorial! If your video is not .flv, check out yesterdays tutorial to learn how to convert it!
Dont you just love when theyre short and sweet?
You can download this tutorial as a PDF by clicking this picture!
I do plan on adding some other Smart Notebook Tutorials in the future, but in the meantime I want to add a Microsoft Word/PowerPoint option... how to make any font into an outline!
Thursday, March 13, 2014
My New Cat in the Hat Classroom Theme!!!
While some of you are winding down your school year, I still have two months to go... and I decided that a classroom redesign was in order. Ive come across so many cute classroom themes online (jungle, wild west, pirates), but none of them quite worked with what I already had in my classroom.
Finally, it hit me... I needed to make give a classroom a Dr. Seuss theme, and since my favorite Seuss book is Cat in the Hat, I used that as my inspiration for my room!
Update 5/14/2013: For those of you who have been asking for the set, I have redesigned to abide by all copyright laws and reposted it here. It looks different from the pictures below but its still super cute!

My first order of business was the "Word Wall" or actually, in my case, the "Word Window." The background was already the perfect shade of blue, I just needed to add Sally and Nick!
 Those blue and green blurred out papers at the bottom are the poems from the book "No More Letter of the Week" and a picture of the kid that was assigned that letter back in September/October. If you havent seen the book yet, it totally revamped the way I teach phonics and it made a major difference for the kids!
I ended up doing this using my smart board! I pulled up the image of Sally and Nick onto my computer, hung bulletin board paper up on the smart board, and traced the image. Nice and easy!

Next, I needed to revamp my morning meeting resources. I use a growing number line for how many days weve been in school, so I started with that. I used my favorite font, and put red circles around the numbers you say when you count by fives, and "Cat in the Hat" hats on the numbers you say when you count by tens. And yes, I re-did the numbers for the place value chart so the font matched!

After that, I redesigned my "Morning Helper" list. Each day, one of my students teaches morning meeting. I use a list posted on the wall as a rotating schedule to keep it fair for everyone! My school has a poster machine that prints in color, so I was able to make this sign very large... to given you an idea of size, that scroll is a piece of legal paper!

Then, I re-did my months of the year sign! Even though Im not in a bilingual class, the kids love learning other languages, so I teach them the months of the year in Spanish as well! Again, this was printed on our wonderful poster machine!

Obviously, I needed to do a sign for the days of the week also.


I also made names for the days of the week that match the colors/textures of the other signs I made for the months/days.

Another main part of our morning meeting is "More and Less Math." We look at the number of days weve been in school and figure out what day it will be when we have one more, and what day it was when we had one less. We model this will the sticks from our place value chart and reference our number line in the process. The kids love it. And... now it clearly goes along with the theme!

Read More..
Finally, it hit me... I needed to make give a classroom a Dr. Seuss theme, and since my favorite Seuss book is Cat in the Hat, I used that as my inspiration for my room!
Update 5/14/2013: For those of you who have been asking for the set, I have redesigned to abide by all copyright laws and reposted it here. It looks different from the pictures below but its still super cute!
My first order of business was the "Word Wall" or actually, in my case, the "Word Window." The background was already the perfect shade of blue, I just needed to add Sally and Nick!
Next, I needed to revamp my morning meeting resources. I use a growing number line for how many days weve been in school, so I started with that. I used my favorite font, and put red circles around the numbers you say when you count by fives, and "Cat in the Hat" hats on the numbers you say when you count by tens. And yes, I re-did the numbers for the place value chart so the font matched!
After that, I redesigned my "Morning Helper" list. Each day, one of my students teaches morning meeting. I use a list posted on the wall as a rotating schedule to keep it fair for everyone! My school has a poster machine that prints in color, so I was able to make this sign very large... to given you an idea of size, that scroll is a piece of legal paper!
Then, I re-did my months of the year sign! Even though Im not in a bilingual class, the kids love learning other languages, so I teach them the months of the year in Spanish as well! Again, this was printed on our wonderful poster machine!
Obviously, I needed to do a sign for the days of the week also.
I stick the days of the week to the wall using velcro. I also have magnetic tape on the back of the Days of the Week so that they can stick to my metal cabinet.
Heres a overview of this part of my morning meeting area:
Heres a overview of this part of my morning meeting area:
Heres a close up of the centers groups that you see in the right hand side of that photo. I made it look like the Cat in the Hat was presenting the center groups, and I love the texture I put on the word centers!

I put that same texture on the new title I made for "Our Schedule" below.
I put that same texture on the new title I made for "Our Schedule" below.
I also made names for the days of the week that match the colors/textures of the other signs I made for the months/days.
Another main part of our morning meeting is "More and Less Math." We look at the number of days weve been in school and figure out what day it will be when we have one more, and what day it was when we had one less. We model this will the sticks from our place value chart and reference our number line in the process. The kids love it. And... now it clearly goes along with the theme!
I know, I really went overboard! And Im not even done showing you everything yet! Now that morning meeting is over... you have to check out what I did in the rest of the class!
We do a routine during independent reading where we read with a buddy. The students read for three minutes independently, then for three minutes partner one ("Thing 1") reads, and for three minutes partner two ("Thing 2") reads. I have these signs at the students seats to remind them who their partner is and give a constant visual of which partner is reading first.

Update 5/12/2012: The theme pack is up on TPT for $4 and I made a freebie to go along with it!
To view the pack on TPT, click the picture below:

To get the freebie, click the picture below! There are now two versions of this freebie thanks to Busy Bee, who left a great comment below! Thank you for pointing out how this could be confusing for students!

They may look the same, but the location of "ten less" and "ten more" is switched so it mimics the look of a 100 chart and corresponds with the Envision Math Program!

Note: This freebie is hosted on Google Docs. Once you open the file, click File > Download to save onto your computer!
If you like the freebie, be sure to head over to my 200 Follower giveaway to win the whole set! The contest is going through May 20, 2012!

This post is linked up with Manic Monday! Be sure to head over there to see some other great freebies!

We do a routine during independent reading where we read with a buddy. The students read for three minutes independently, then for three minutes partner one ("Thing 1") reads, and for three minutes partner two ("Thing 2") reads. I have these signs at the students seats to remind them who their partner is and give a constant visual of which partner is reading first.
Update 5/12/2012: The theme pack is up on TPT for $4 and I made a freebie to go along with it!
To view the pack on TPT, click the picture below:
To get the freebie, click the picture below! There are now two versions of this freebie thanks to Busy Bee, who left a great comment below! Thank you for pointing out how this could be confusing for students!
They may look the same, but the location of "ten less" and "ten more" is switched so it mimics the look of a 100 chart and corresponds with the Envision Math Program!
Note: This freebie is hosted on Google Docs. Once you open the file, click File > Download to save onto your computer!
If you like the freebie, be sure to head over to my 200 Follower giveaway to win the whole set! The contest is going through May 20, 2012!
This post is linked up with Manic Monday! Be sure to head over there to see some other great freebies!
Subscribe to:
Posts (Atom)