Showing posts with label jailbreak. Show all posts

Sunday, October 13, 2013

Jailbreak Unthreated IOS 5 on Iphone 3GS oldbootroom Only


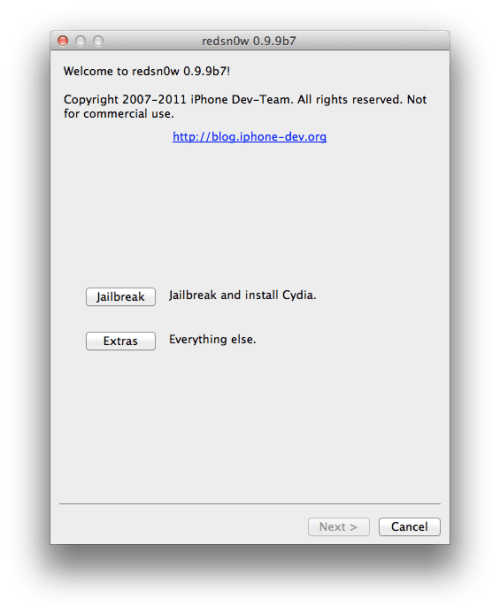
With success and easy way as usual Thanks to DEV Team on the new Release of Redsn0w 0.9.9b4

Notice This Untreated Jailbreak ONLY FOR 3GS old Bootrom, if you want to know if your boot room old or fixed new,, u can find it from the serial No.

My the first 5 digital are 87939, it mean My are week 39 of 2009, check this before you work, all Iphone 3Gs from week 40 and bellow are old bootroom.

=================================================

update your 3GS with stock ipsw 5 with itunes ( if you are on factory unlock)
user with Ipadbaseband,, update with custom IOS 5 ( where no BB update include

after that run redsn0w and selct the original ios 5 and jailbreak ( at question ur bootrrom old or new ( Choice No, )

after finish, your iphone will restart and cydia will be white logo,, dont worry

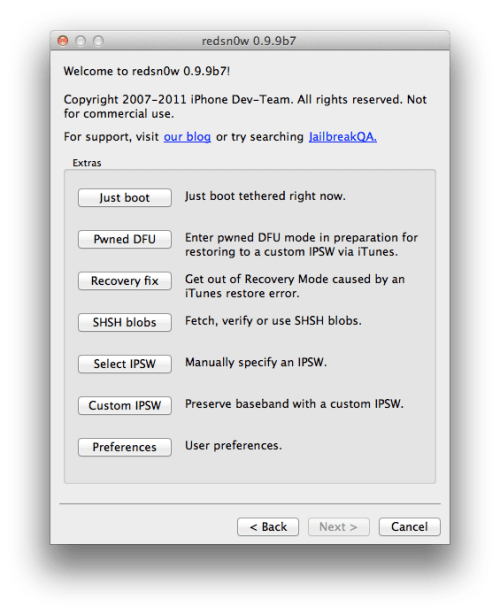
run redsn0w again and choice just boot under extrs,,
cydia will be fine,,, install it and thats all, you have unthreated jail break.

AGAIN, ONLY 3GS Oldbootroom, it will not work to 4, or 3gs new bootrrom.
Read More..

Saturday, October 12, 2013

Firmware Jailbreak and Tools Downloads Collection

Welcome to Jailbreak’s Downloads Section. In this section you will find download links to jailbreaking tools such as PwnageTool, RedSn0w, Sn0wBreeze, GreenPois0n, Seas0nPass, JailbreakMe and more! We will also be including download links to important utilities like iFaith, TinyUmbrella and F0recast.

Note #1: Updates will be posted as new jailbreaking tools are released. Also, if a jailbreaking tool’s name is in bold it means that it’s the latest version available.

Click here to enlarge
PwnageTool is a MAC OSX only jailbreaking tool that jailbreaks your iOS iDevice by creating a custom IPSW (Apple’s Firmware File); once this IPSW is created you must restore it to your iDevice through iTunes


PwnageTool 4.3.3.1 (iOS 4.3.3): Mac OS X Download
PwnageTool 4.3.3 (iOS 4.3.3): Mac OS X Download
PwnageTool 4.3.2 (iOS 4.3.2): Mac OS X Download
PwnageTool 4.3 (iOS 4.3.1): Mac OS X Download
PwnageTool 4.2 (iOS 4.2.1/4.2.6): Mac OS X Download
Click here to enlarge

Sn0wBreeze is actually the Windows alternative to the PwnageTool. It functions and operates the exact same way as the PwnageTool – Sn0wBreeze jailbreaks your iOS iDevice by creating a custom IPSW (Apple’s Firmware File); once this IPSW is created you must restore it to your iDevice through iTunes.


Sn0wBreeze 2.8b8 (iOS 5 GM): Windows Download
Sn0wBreeze 2.8b7 (iOS 5 beta 7): Windows Download
Sn0wBreeze 2.8b6 (iOS 5 beta 6): Windows Download
Sn0wBreeze 2.8b5 (iOS 5 beta 5): Windows Download
Sn0wBreeze 2.8b4 (iOS 5 beta 3): Windows Download
Sn0wBreeze 2.8b3 (iOS 5 beta 2): Windows Download

Sn0wBreeze 2.7.3 (iOS 4.2.8/4.3.3): Windows Download
Sn0wBreeze 2.7.2 (iOS 4.3 Build 8F305 Apple TV 2G): Windows Download
Sn0wBreeze 2.7.1 (iOS 4.3.3/4.2.8): Windows Download
Sn0wBreeze 2.7 (iOS 4.3.3/4.2.8): Windows Download
Sn0wBreeze 2.6.1 (iOS 4.3.2): Windows Download
Sn0wBreeze 2.6 (iOS 4.3.2/4.2.7): Windows Download
Sn0wBreeze 2.5.1 (iOS 4.3.1): Windows Download
Sn0wBreeze 2.5 (iOS 4.3.1): Windows Download
Sn0wBreeze 2.2.1 (iOS 4.2.1): Windows Download
Sn0wBreeze 2.1 (iOS 3.2.2/4.1): Windows Download
Sn0wBreeze 2.0.2 (Fixes for Error 37 and hacktivation): Windows Download
Sn0wBreeze 2 (iOS 3.1.2 ): Windows Download
Sn0wBreeze 1.7: Windows Download
Click here to enlarge
RedSn0w (originally named QuickPwn) was re-released during the times of the 2.x.x firmware generation, as one of the first jailbreaking tools to jailbreak the iPod Touch 2G. Maintained and created by the Dev-Team, RedSn0w has become one of the most used jailbreaking tools to jailbreak the iOS firmware.

RedSn0w 0.9.9b3: Windows Download | Mac OS X Download
RedSn0w 0.9.9b2: Windows Download | Mac OS X Download
RedSn0w 0.9.9b1: Windows Download | Mac OS X Download
RedSn0w 0.9.8b7c: Windows Download | Mac OS X Download
RedSn0w 0.9.8b7b: Windows Download | Mac OS X Download
RedSn0w 0.9.8b7: Windows Download | Mac OS X Download
RedSn0w 0.9.8b6: Windows Download | Mac OS X Download
RedSn0w 0.9.8b5: Windows Download | Mac OS X Download
RedSn0w 0.9.8b4: Windows Download | Mac OS X Download
RedSn0w 0.9.8b3: Windows Download | Mac OS X Download
RedSn0w 0.9.8b2: Windows Download | Mac OS X Download
RedSn0w 0.9.6rc19: Windows Download | Mac OS X Download
Redsn0w 0.9.6rc18: Windows Download | Mac OS X Download
Click here to enlarge
GreenPois0n jailbreaking tool was first released on October 12th, 2010 and it was one of the first jailbreaking tools to jailbreak the iOS 4.1 firmware. GreenPois0n is a one click jailbreaking tool; meaning that all you need to do to jailbreak your iDevice is click a button.


GreenPois0n RC6.1: Windows Download | Mac OS X Download
GreenPois0n RC6: Windows Download | Mac OS X Download
GreenPois0n RC5b4: Windows Download | Mac OS X Download
GreenPois0n RC4: Windows Download | Mac OS X Download | Linux Download
Click here to enlarge

Seas0nPass is an Apple TV 2G specific jailbreaking tool created by the FireFore development team.
Seas0nPass (Aug 19th, 2011 update): Windows Download | Mac OS X Download

Click here to enlarge
JailbreakMe is a userland jailbreak. Meaning that all you need to do to jailbreak your iDevice is visit JailbreakMe.com and just like that your iDevice will be Jailbroken. This jailbreak works on all iDevices running up to the iOS 4.3.3 firmware.


JailbreakMe 3.0: Visit JailbreakMe

JailbreakMe 2.0: Visit JailbreakMe
SPIRIT IMAGE
Spirit: Windows Download | Mac OS X Download
Click here to enlarge
TinyUmbrella is an SHSH saving tool that allows you to downgrade your iDevice’s firmware version to a lower version than you are currently running. This can often times be helpful in case you accidentally update to a firmware version that cannot be jailbroken; as by default Apple does not allow downgrading.


TinyUmbrella 5.00.11: Windows Download | Mac OS X Download


TinyUmbrella 5.00.10: Windows Download | Mac OS X Download


TinyUmbrella 5.00.09: Windows Download | Mac OS X Download


TinyUmbrella 5.00.08: Windows Download | Mac OS X Download


TinyUmbrella 5.00.07: Windows Download | Mac OS X Download
TinyUmbrella 5.00.06: Windows Download | Mac OS X Download
TinyUmbrella 5.00.05: Windows Download | Mac OS X Download
TinyUmbrella 5.00.04: Windows Download | Mac OS X Download
TinyUmbrella 5.00.03: Windows Download | Mac OS X Download
TinyUmbrella 5.00.02: Windows Download | Mac OS X Download
TinyUmbrella 5.00.01: Windows Download | Mac OS X Download
TinyUmbrella 5.00.00: Windows Download | Mac OS X Download
TinyUmbrella 4.33.02: Windows Download | Mac OS X Download
TinyUmbrella 4.33.01: Windows Download | Mac OS X Download
TinyUmbrella 4.33.00: Windows Download | Mac OS X Download
Click here to enlarge


iFaith is an SHSH saving tool that dumps SHSH blobs directly on to your iDevice. Dumping your SHSH blobs allows you to downgrade your iDevice’s firmware version to a lower version than you are currently running. This can often times be helpful in case you accidentally update to a firmware version that cannot be jailbroken; as by default Apple does not allow downgrading.


iFaith 1.3.2: Windows Download


iFaith 1.3.1: Windows Download


iFaith 1.3: Windows Download


iFaith 1.2.1: Windows Download


iFaith 1.2: Windows Download


iFaith 1.1: Windows Download


iFaith 1.0: Windows Download
Click here to enlarge


RecBoot is an application that easily kicks your iPhone, iPod Touch or iPad out of Recovery Mode and also puts your iPhone, iPod Touch or iPad into Recovery Mode.


RecBoot v2.2: Mac OS X Download


RecBoot v1.3: Windows Download | Linux Download
RecBoot v1.0.2 Mac OS X Download


Click here to enlarge
F0recast is a handy tool that will tell you information about your iDevice. For example: whether or not it can be jailbroken/unlocked.


Click here to enlarge


ipswDownloader allows you to easily download firmware files for your iDevice from an easy to use GUI (graphical user interface). Additionally the tool tells you whether or not the firmware you are downloading can be jailbroken or Unlocked.


ipswDownloader 0.5: Windows Download | Mac OS X Download (32 bit) | Mac OS X Download (64 bit)
Click here to enlarge


iTunes 10.2.0 Windows / Mac OS X Download | Windows / Mac OS X (64-bit) Download
Click here to enlarge


1.0.0: iPhone1,1_1.0_1A543a_Restore.ipsw
1.0.1: iPhone1,1_1.0.1_1C25_Restore.ipsw
1.0.2: iPhone1,1_1.0.2_1C28_Restore.ipsw
1.1.1: iPhone1,1_1.1.1_3A109a_Restore.ipsw
1.1.2: iPhone1,1_1.1.2_3B48b_Restore.ipsw
1.1.3: iPhone1,1_1.1.3_4A93_Restore.ipsw
1.1.4: iPhone1,1_1.1.4_4A102_Restore.ipsw
2.0.0 (2G): iPhone1,1_2.0_5A347_Restore.ipsw
2.0.0 (3G): iPhone1,2_2.0_5A347_Restore.ipsw
2.0.1 (2G): iPhone1,1_2.0.1_5B108_Restore.ipsw
2.0.1 (3G): iPhone1,2_2.0.1_5B108_Restore.ipsw
2.0.2 (2G): iPhone1,1_2.0.2_5C1_Restore.ipsw
2.0.2 (3G): iPhone1,2_2.0.2_5C1_Restore.ipsw
2.1.0 (2G): iPhone1,1_2.1_5F136_Restore.ipsw
2.1.0 (3G): iPhone1,2_2.1_5F136_Restore.ipsw
2.2.0 (2G): iPhone1,1_2.2_5G77_Restore.ipsw
2.2.0 (3G): iPhone1,2_2.2_5G77_Restore.ipsw
2.2.1 (2G): iPhone1,1_2.2.1_5H1_Restore.ipsw
2.2.1 (3G): iPhone1,2_2.2.1_5H11_Restore.ipsw
3.0.0 (2G): iPhone1,1_3.0_7A341_Restore.ipsw
3.0.0 (3G): iPhone1,2_3.0_7A341_Restore.ipsw
3.0.0 (3GS): iPhone2,1_3.0_7A341_Restore.ipsw
3.0.1 (2G): iPhone1,1_3.0.1_7A400_Restore.ipsw
3.0.1 (3G): iPhone1,2_3.0.1_7A400_Restore.ipsw
3.0.1 (3GS): iPhone2,1_3.0.1_7A400_Restore.ipsw
3.1.0 (2G): iPhone1,1_3.1_7C144_Restore.ipsw
3.1.0 (3G): iPhone1,2_3.1_7C144_Restore.ipsw
3.1.0 (3GS): iPhone2,1_3.1_7C144_Restore.ipsw
3.1.2 (2G): iPhone1,1_3.1.2_7D11_Restore.ipsw
3.1.2 (3G): iPhone1,2_3.1.2_7D11_Restore.ipsw
3.1.2 (3GS): iPhone2,1_3.1.2_7D11_Restore.ipsw
3.1.3 (2G): iPhone1,1_3.1.3_7E18_Restore.ipsw
3.1.3 (3G): iPhone1,2_3.1.3_7E18_Restore.ipsw
3.1.3 (3GS): iPhone2,1_3.1.3_7E18_Restore.ipsw
4.0.0 (3G): iPhone1,2_4.0_8A293_Restore.ipsw
4.0.0 (3GS): iPhone2,1_4.0_8A293_Restore.ipsw
4.0.0 (4): iPhone3,1_4.0_8A293_Restore.ipsw
4.0.1 (3G): iPhone1,2_4.0.1_8A306_Restore.ipsw
4.0.1 (3GS): iPhone2,1_4.0.1_8A306_Restore.ipsw
4.0.1 (4): iPhone3,1_4.0.1_8A306_Restore.ipsw
4.0.2 (3G): iPhone1,2_4.0.2_8A400_Restore.ipsw
4.0.2 (3GS): iPhone2,1_4.0.2_8A400_Restore.ipsw
4.0.2 (4): iPhone3,1_4.0.2_8A400_Restore.ipsw
4.1.0 (3G): iPhone1,2_4.1_8B117_Restore.ipsw
4.1.0 (3GS): iPhone2,1_4.1_8B117_Restore.ipsw
4.1.0 (4): iPhone3,1_4.1_8B117_Restore.ipsw
4.2.1 (3G): iPhone1,2_4.2.1_8C148_Restore.ipsw
4.2.1 (3GS): iPhone2,1_4.2.1_8C148a_Restore.ipsw
4.2.1 (4): iPhone3,1_4.2.1_8C148_Restore.ipsw
4.2.6 (4 CDMA): iPhone3,3_4.2.6_8E200_Restore.ipsw
4.3.0 (3GS): iPhone2,1_4.3_8F190_Restore.ipsw
4.3.0 (4 GSM): iPhone3,1_4.3_8F190_Restore.ipsw
4.3.1 (3GS): iPhone2,1_4.3.1_8G4_Restore.ipsw
4.3.1 (4 GSM): iPhone3,1_4.3.1_8G4_Restore.ipsw
4.3.2 (3GS): iPhone2,1_4.3.2_8H7_Restore.ipsw
4.3.2 (4 GSM): iPhone3,1_4.3.2_8H7_Restore.ipsw
4.2.7 (4 CDMA): iPhone3,3_4.2.7_8E303_Restore.ipsw
4.2.8 (4 CDMA): iPhone3,3_4.2.8_8E401_Restore.ipsw
4.3.3 (3GS): iPhone2,1_4.3.3_8J2_Restore.ipsw
4.3.3 (4 GSM): iPhone3,1_4.3.3_8J2_Restore.ipsw
4.2.9 (4 CDMA): iPhone3,3_4.2.9_8E501_Restore.ipsw
4.3.4 (3GS): iPhone2,1_4.3.4_8K2_Restore.ipsw
4.3.4 (4 GSM): iPhone3,1_4.3.4_8K2_Restore.ipsw
4.2.10 (4 CDMA): iPhone3,3_4.2.10_8E600_Restore.ipsw
4.3.5 (3GS): iPhone2,1_4.3.5_8L1_Restore.ipsw
4.3.5 (4 GSM): iPhone3,1_4.3.5_8L1_Restore.ipsw
Click here to enlarge


1.1: iPod1,1_1.1_3A101a_Restore.ipsw
1.1.1: iPod1,1_1.1.1_3A110a_Restore.ipsw
1.1.2: iPod1,1_1.1.2_3B48b_Restore.ipsw
1.1.3: iPod1,1_1.1.3_4A93_Restore.ipsw
1.1.4: iPod1,1_1.1.4_4A102_Restore.ipsw
1.1.5: iPod1,1_1.1.5_4B1_Restore.ipsw
2.0.0: iPod1,1_2.0_5A347_Restore.ipsw (Must purchase through iTunes)
2.0.1: iPod1,1_2.0.1_5B108_Restore.ipsw
2.2.0 (1G): iPod1,1_2.2_5G77_Restore.ipsw
2.2.0 (2G): iPod2,1_2.2_5G77a_Restore.ipsw
2.2.1 (2G): iPod2,1_2.2.1_5H11a_Restore.ipsw
3.1.2 (3G): iPod3,1_3.1.2_7D11_Restore.ipsw
3.1.3 (3G): iPod3,1_3.1.3_7E18_Restore.ipsw
4.0.0 (2G): iPod2,1_4.0_8A293_Restore.ipsw
4.0.0 (3G): iPod3,1_4.0_8A293_Restore.ipsw
4.0.2 (2G): iPod2,1_4.0.2_8A400_Restore.ipsw
4.0.2 (3G): iPod3,1_4.0.2_8A400_Restore.ipsw
4.1.0 (2G): iPod2,1_4.1_8B117_Restore.ipsw
4.1.0 (3G): iPod3,1_4.1_8B117_Restore.ipsw
4.1.0 (4G): iPod4,1_4.1_8B117_Restore.ipsw
4.2.1 (2G): iPod2,1_4.2.1_8C148_Restore.ipsw
4.2.1 (3G): iPod3,1_4.2.1_8C148_Restore.ipsw
4.2.1 (4G): iPod4,1_4.2.1_8C148_Restore.ipsw
4.3.0 (3G): iPod3,1_4.3_8F190_Restore.ipsw
4.3.0 (4G): iPod4,1_4.3_8F190_Restore.ipsw
4.3.1 (3G): iPod3,1_4.3.1_8G4_Restore.ipsw
4.3.1 (4G): iPod4,1_4.3.1_8G4_Restore.ipsw
4.3.2 (3G): iPod3,1_4.3.2_8H7_Restore.ipsw
4.3.2 (4G): iPod4,1_4.3.2_8H7_Restore.ipsw
4.3.3 (3G): iPod3,1_4.3.3_8J2_Restore.ipsw
4.3.3 (4G): iPod4,1_4.3.3_8J2_Restore.ipsw
4.3.4 (3G): iPod3,1_4.3.4_8K2_Restore.ipsw
4.3.4 (4G): iPod4,1_4.3.4_8K2_Restore.ipsw
4.3.5 (3G): iPod3,1_4.3.5_8L1_Restore.ipsw
4.3.5 (4G): iPod4,1_4.3.5_8L1_Restore.ipsw
Click here to enlarge
3.2.0: iPad1,1_3.2_7B367_Restore.ipsw
3.2.1: iPad1,1_3.2.1_7B405_Restore.ipsw
3.2.2: iPad1,1_3.2.2_7B500_Restore.ipsw
4.2.1: iPad1,1_4.2.1_8C148_Restore.ipsw
4.3.0 (1): iPad1,1_4.3_8F190_Restore.ipsw
4.3.1 (iPad 1): iPad1,1_4.3.1_8G4_Restore.ipsw
4.3.1 (iPad 2 Wi-Fi): iPad2,1_4.3.1_8G4_Restore.ipsw
4.3.1 (iPad 2 GSM): iPad2,2_4.3.1_8G4_Restore.ipsw
4.3.1 (iPad 2 CDMA): iPad2,3_4.3.1_8G4_Restore.ipsw
4.3.2 (iPad 1): iPad1,1_4.3.2_8H7_Restore.ipsw
4.3.2 (iPad 2 Wi-Fi): iPad2,1_4.3.2_8H7_Restore.ipsw
4.3.2 (iPad 2 GSM): iPad2,2_4.3.2_8H7_Restore.ipsw
4.3.2 (iPad 2 CDMA): iPad2,3_4.3.2_8H8_Restore.ipsw
4.3.3 (iPad 1): iPad1,1_4.3.3_8J3_Restore.ipsw
4.3.3 (iPad 2 Wi-Fi): iPad2,1_4.3.3_8J2_Restore.ipsw
4.3.3 (iPad 2 GSM): iPad2,2_4.3.3_8J2_Restore.ipsw
4.3.3 (iPad 2 CDMA): iPad2,3_4.3.3_8J2_Restore.ipsw
4.3.4 (iPad 1): iPad1,1_4.3.4_8K2_Restore.ipsw
4.3.4 (iPad 2 Wi-Fi): iPad2,1_4.3.4_8K2_Restore.ipsw
4.3.4 (iPad 2 GSM): iPad2,2_4.3.4_8K2_Restore.ipsw
4.3.4 (iPad 2 CDMA): iPad2,3_4.3.4_8K2_Restore.ipsw
4.3.5 (iPad 1): iPad1,1_4.3.5_8L1_Restore.ipsw
4.3.5 (iPad 2 Wi-Fi): iPad2,1_4.3.5_8L1_Restore.ipsw
4.3.5 (iPad 2 GSM): iPad2,2_4.3.5_8L1_Restore.ipsw
4.3.5 (iPad 2 CDMA): iPad2,3_4.3.5_8L1_Restore.ipsw
Click here to enlarge


4.1.0 (Apple TV 2G): AppleTV2,1_4.1_8M89_Restore.ipsw
4.2.0 (Apple TV 2G): AppleTV2,1_4.2_8C150_Restore.ipsw
4.2.1 (Apple TV 2G): AppleTV2,1_4.2.1_8C154_Restore.ipsw
4.3.0 (Apple TV 2G): AppleTV2,1_4.3_8F191m_Restore.ipsw
4.3.0 (Apple TV 2G – Build 8F202): AppleTV2,1_4.3_8F202_Restore.ipsw
4.3.0 (Apple TV 2G – Build 8F305): AppleTV2,1_4.3_8F305_Restore.ipsw
4.3.0 (Apple TV 2G – Build 8F455): AppleTV2,1_4.3_8F455_Restore.ipsw
Read More..

Friday, October 11, 2013

Jailbreak 4 3 5 iPad 2 JailbreakMe

Earlier today Apple has released the unexpected iOS 4.3.5 for iPhone, iPod touch and iPad to fix a security issue. No doubt that theres many iPad 2 users have accedintely hit the update button. So far theres no strait way to Jailbreak 4.3.5 iPad 2.

Click here to enlarge

There is only way to Jailbreak 4.3.5 iPad 2 so far, but its only work with iPad 2 Wifi (not compatible with 3G iPad 2) as Jailbreak 4.3.5 iPad 2 based on downgrade process which doesnt work with those 3G iPads
Read More..

Wednesday, October 9, 2013

Redsn0w 0 9 6 Can Jailbreak iOS 4 3 2 But It’s Tethered…

iOS 4.3.21 Redsn0w 0.9.6 Can Jailbreak iOS 4.3.2. But Its Tethered...

Just a quick heads-up: redsn0w 0.9.6rc12 can jailbreak iOS 4.3.2 if you point it at iOS 4.3.1, but it’s a tethered jailbreak. If you don’t know how to use the tool, check out  redsn0w tutorial. NOTE: unlockers DO NOT update.
Read More..

iOS 5 beta 2 allows recovery mode via WiFi Wireless Jailbreak Soon Video


Apple pushed out iOS 5 beta 2 for developers yesterday with numerous new features and enhancements. iOS 5 beta 2 not only allows you to sync your media over WiFi with Apple’s new WiFi Sync feature but it also allows you to enter Recovery Mode via WiFi using a recovery tool such as TinyUmbrella or Recboot!
Click here to enlarge

Earlier, users used to get into recovery mode by holding down the combination of buttons which often resulted in user frustration. However, with iOS 5 beta you can do this completely wirelessly, using RecBoot for Mac and other similar utilities like TinyUmbrellea. 9to5 Mac reported
You not only can sync your media wirelessly in iOS 5, but it appears you can enter Recovery Mode using ‘RecBoot, Etc’ from the Mac.
The possibilities for wireless recovery mode are endless, if it stays connected, eventually we might even see wireless Jailbreak utilities!


Read More..

Monday, October 7, 2013

How to Perform a Semi Tethered Jailbreak of iOS 5

These are instructions on how to perform a semi tethered jailbreak of your iOS 5 iPhone, iPad, or iPod touch.


A semi-tethered jailbreak is an interim solution which solves the problem of being unable to reboot with a tethered jailbreak. The semi tethered jailbreak by BigBoss will allow you to reboot on the road, but with limited functionality. It is enough that you are no longer stranded, and you can use your phone, text, and many other features. This is just until you get home and can use redsn0w again to “just boot tethered”. Once you do that, you’re back to fully functional state.

Step One
Jailbreak and boot your device tethered using the instructions below:

● iPhone 4 (Mac, Windows)
● iPhone 3GS (Mac, Windows)
● iPhone - No Baseband Update (Mac)
● iPod Touch 4G (Mac, Windows)
● iPod Touch 3G (Mac, Windows)
● iPad 1 (Mac, Windows)

Step Two
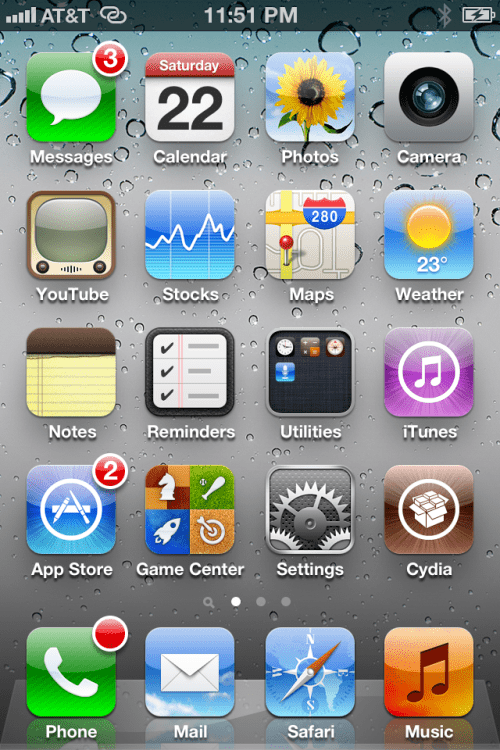
Press to launch Cydia from your Springboard.

Click here to enlarge

Step Three
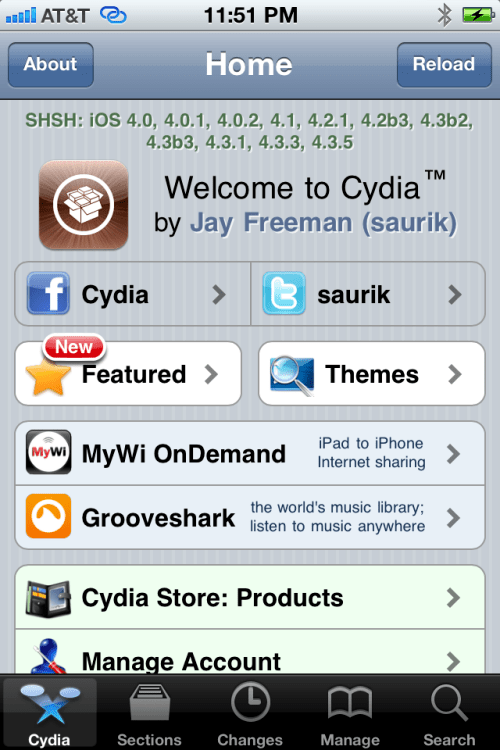
Press to select Manage from the tabs at the bottom of the screen.
Click here to enlarge

Step Four
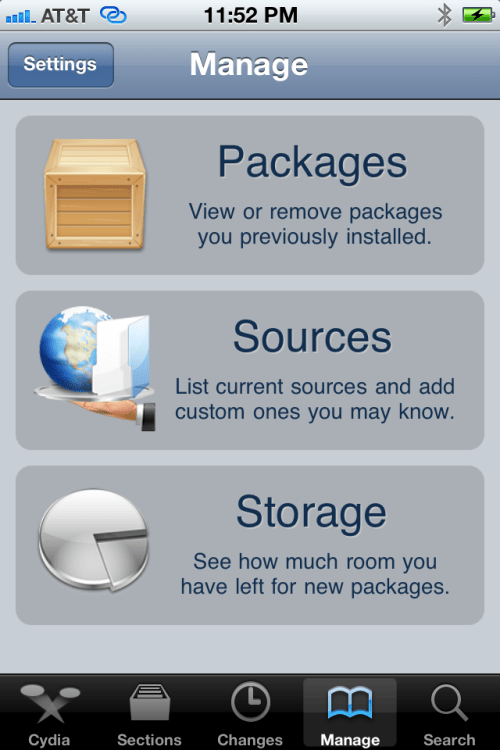
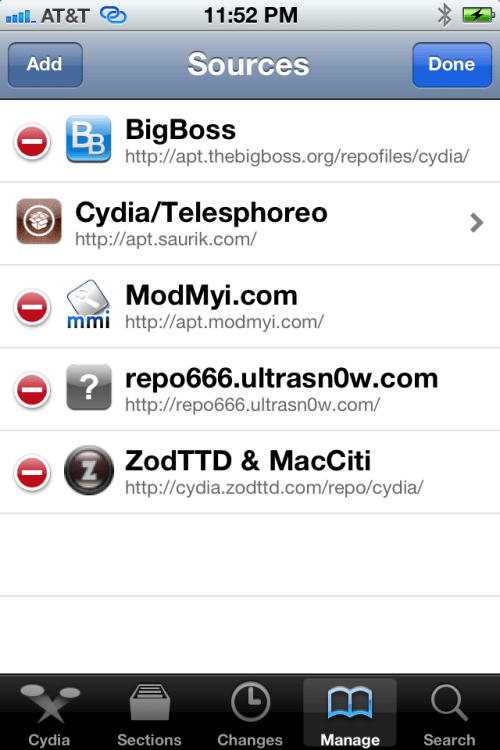
Press the large Sources button.
Click here to enlarge

Step Five
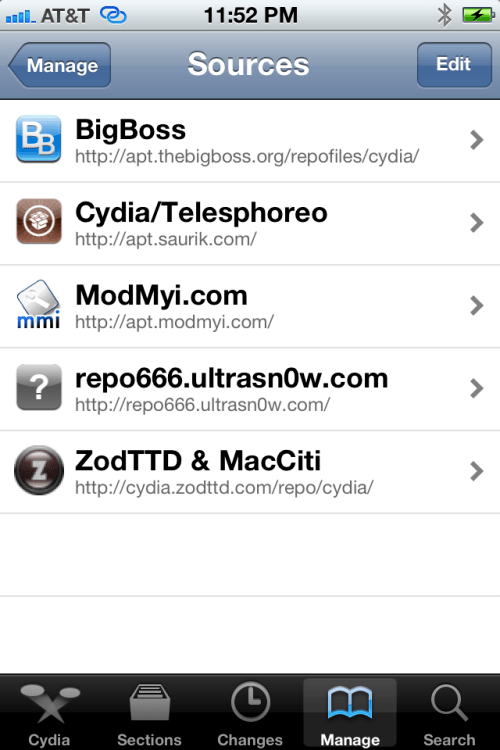
Press the Edit button at the top right of the screen.
Click here to enlarge

Step Six
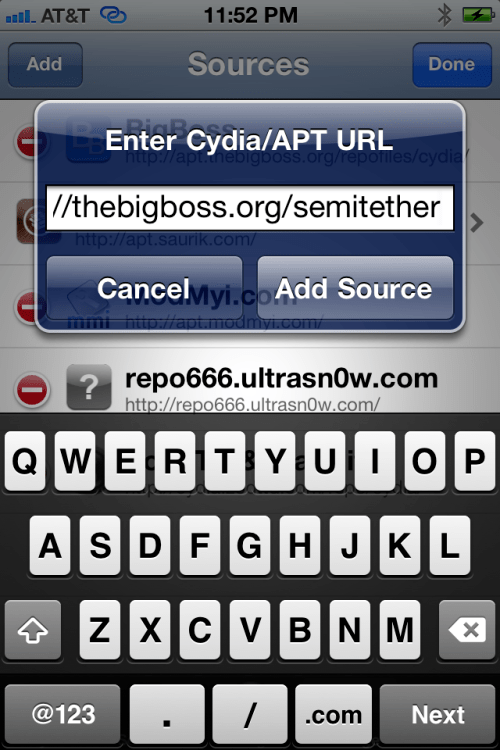
Press the Add button at the top left of the screen.
Click here to enlarge

Step Seven
Input Semitethered Jailbreak | iPhone News, Apps, BigBoss, Guides & Jailbreaking into the text field and press the Add Source button.
Click here to enlarge

Step Eight
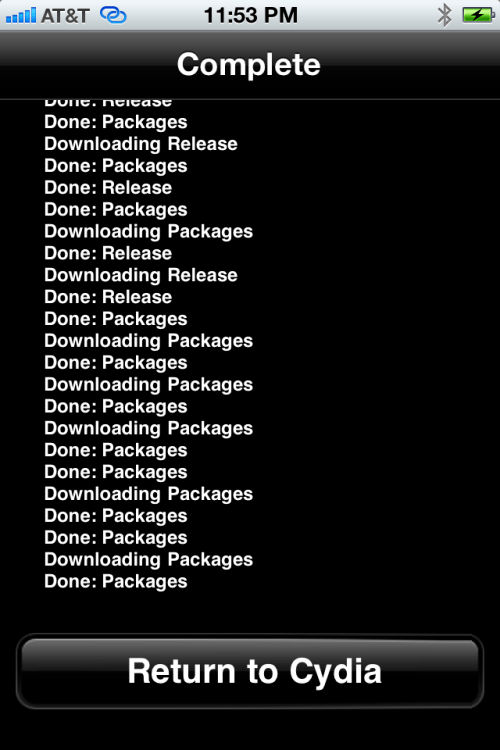
Press the large Return to Cydia button.
Click here to enlarge

Step Nine
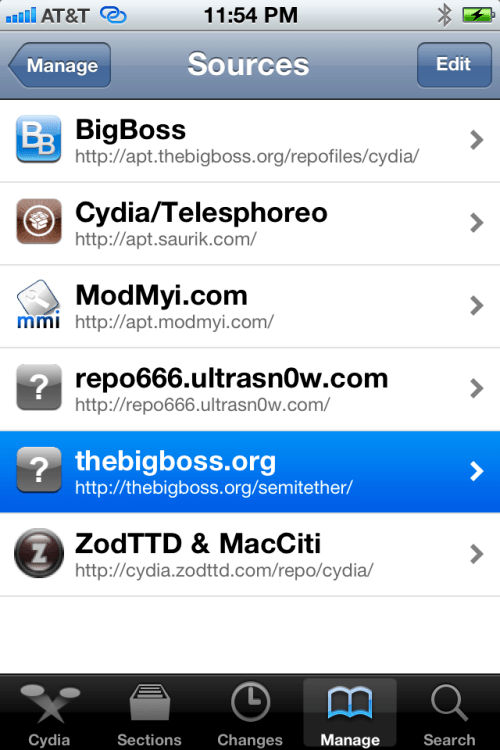
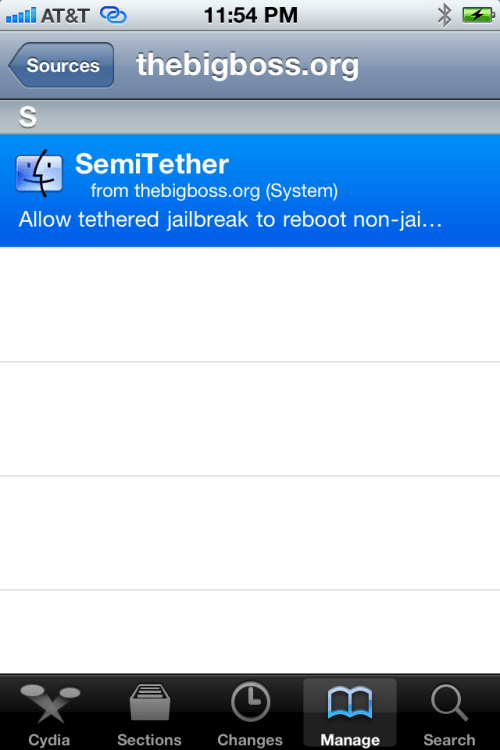
Select thebigboss.org from the list of Sources
Click here to enlarge

Step Ten
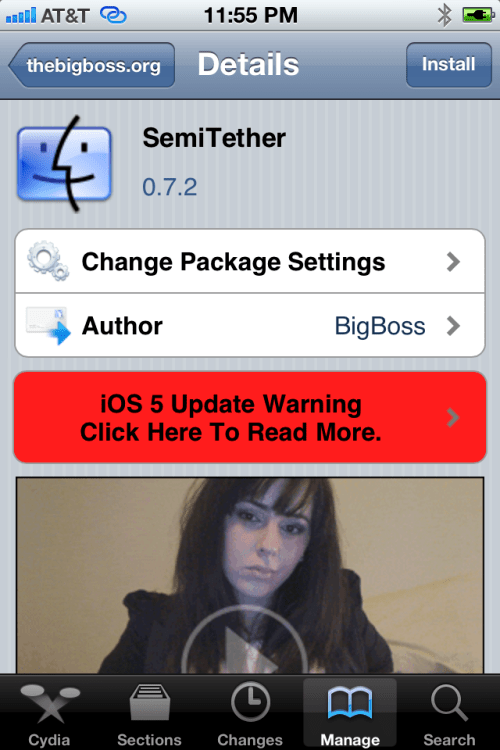
Select SemiTether from the list of Packages
Click here to enlarge

Step Eleven
Press the Install button at the top right of the screen.
Click here to enlarge

Step Twelve
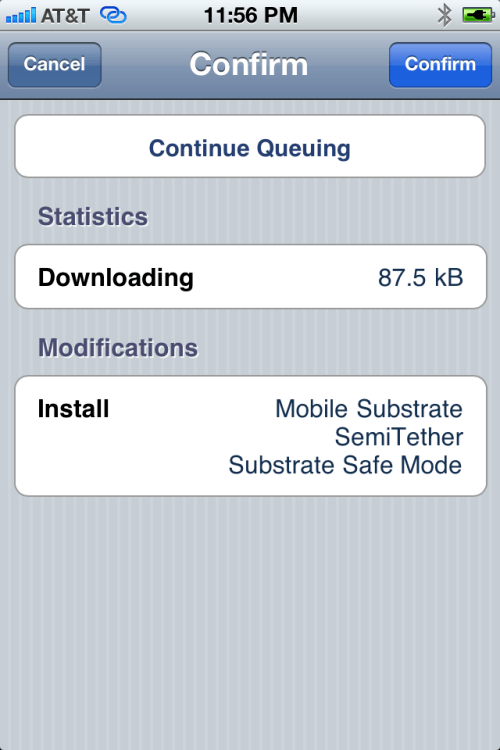
Press the Confirm button to begin installation.

Click here to enlarge

Step Thirteen
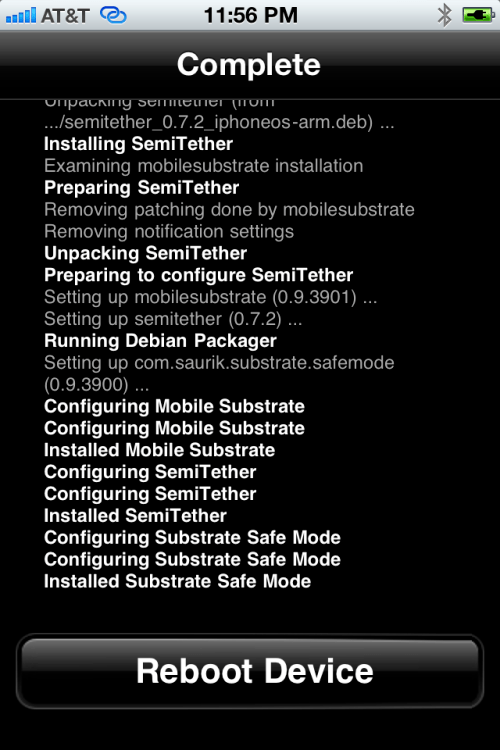
Press the large Reboot Device button.
Click here to enlarge

Youre device will now reboot without stalling at the Apple logo!

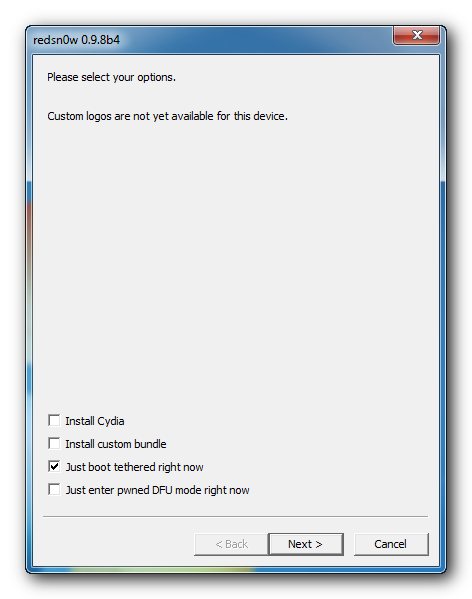
To get full functionality back you will need to boot tethered. Launch RedSn0w as you did in Step One then select Extras then Just boot from the menu.
Click here to enlargeClick here to enlarge


**A big thanks to BigBoss and all those who made this tutorial possible.


 Download iOS 5 Custom Firmware With Semi Tethered Direct Links

Update BigBoss

Semitethered Jailbreak

Author: BigBoss  //  Category: Apps, Jailbreak

Edit: October 23, 2:37am.

I updated to 0.7.9. This version will take about 90 seconds after it first boots up and then your device will respring again. This timing was the only way to get some of the launch daemons to properly relaunch.

This version should fix issues for some of you folks where:
1) Device does not sync with itunes and only errors. Hopefully solved.
2) Device reboots after 2-3 minutes.
3) App sync issue – this is unworkable. Appsync hard patches system files and does not even use mobile substrate. I had to conflict with it. For now, semi-tether boot is impossible with appsync. You guys need to bug those guys to fix appsync to use mobile substrate (like everyone else uses).
Note, Saurik is working on an update to mobile substrate that will solve many of the issues with the semi-tether package. Hopefully this will be out in a day or two. At this time, we can finalize beta testing. I plan to hold further updates until after Saurik has released his mobile substrate update. Saurik’s updates will eliminate the need for the long 90 second respring on boot also.

This update was only tested on iphone 4. After saurik’s mobile substrate changes, more devices will be tested. Next updates coming in next 2-3 days.
——————————–
Original Post:
My iOS5 semitethered jailbreak package is ready for beta testing. What is semitethered jailbreak and why do you care? In short, it is protection for if your device reboots while you’re on the road. Read on.
As you may know, iOS5 currently has a tethered jailbreak. This means that after you have jailbroken and installed most stuff you care about, you go to reboot your device, and it will no longer boot. You will be either stuck at apple logo forever, or you will get to itunes restore screen. When this happens, you have to hook up to your computer and use redsn0w “just boot” feature which gets you rebooted successfully again. It’s not all bad, as iOS5 is pretty stable. But if your device crashes and reboots while you’re out on the road, you are screwed and without a phone until you get home.

An untethered jailbreak is one that does not have such problems. Here you can reboot and the device reboots successfully. Because we are using the limera1n exploit discovered from Geohot last year, we are always guaranteed a tethered jailbreak on last generation devices. A new exploit will need to be found to untether us.
To get us through this period, I have worked on a semi-tethered solution. The semi-tethered jailbreak will allow you to reboot on the road, but with limited functionality. It is enough that you are no longer stranded, and you can use your phone, text, and many other features. This is just until you get home and can use redsn0w again to “just boot tethered”. Once you do that, you’re back to fully functional state.

Here is a summary of what you can and cannot do when in semi-tethered reboot state. Remember, this is only when your device crashed and rebooted on the road and before you got back to your computer to “just boot”. It is better than being stuck in apple logo:
1) Can use phone, sms (text messages)
2) Can use every other stock app on iphone.
3) Cannot use mobile safari
4) Can use other appstore web browsers such as atomic web browser
5) Cannot use mail app. You could install a gmail app from appstore or such instead.
6) You cannot use any jailbreak tweak, app, cydia until you boot tethered.
7) While in the semitether booted state, you should not add a jailbreak ios5 notification such as sbsettings to notifications during this state or your device will be stuck in a respring loop until you get home to “boot tethered”.

Those are all the limitations I have found so far. There may be some others. I may provide a more technical write up on why these limitations exist, but for now it doesn’t really matter. They just do.

Now, there are some other caveats to installing this package:
1) The device will take longer to boot up. When you reboot, it has to reload every service. It will respring a couple times also.

2) According to Saurik, there are some “problems” to reloading all daemons on the fly. This is why mobile substrate installation requires “reboot device” in cydia. I have not experienced any of these problems, but I am not promising they do not exist. This is why we will need testing to see which problems may occur.
I believe the good outweigh the bad here. Once the untethered jailbreak is out, you will not need or want to install this semitether package. In future iOS versions when we are back to having only a tethered jailbreak, you should be able to install this again to semitether your jailbreak.

As far as support for this package, please send me email preferably from Cydia so the proper semitether subject is used. If you want to email me from a computer, and want a response, use this subject: “Cydia/APT(A): semitether”. Remember, this is still in beta stages and may not be perfect. Do not install this if you are not prepared for that.

As for current testing, I have only tested this on an iphone 4 GSM running iOS5. As further testing shows success, I will update this page. Further, when this package seems stable enough, I may move it into the main bigboss source.

To install this, add the following repository to cydia: http://thebigboss.org/semitether. Note: after install, you will have to reboot your device, so make sure you are prepared at a computer to reboot tethered with redsn0w or just “home button out” of cydia and manually respring until you get home.
To test the success of this, simply reboot your device. If it boots up, it worked. Make sure you are near your computer so you can tether boot it after to get your jailbreak functionality back.
Comments are closed.
Read More..

Sunday, October 6, 2013

How to Jailbreak Your iPad 1 Using RedSn0w Windows 5 0b4

These are instructions on how to jailbreak your iPad 1 on the 5.0b4 firmware using RedSn0w for Windows. Since iOS 5.0 has not yet been released these are instructions for developers only. This procedure will not hacktivate so you must have your UDID registered with a developer, and it is tethered.

If you want to jailbreak a lower firmware version you can find the appropriate tutorial here.

Step One
Create a folder on your desktop called Pwnage

Download RedSn0w from here and place it in the Pwnage folder. Likewise, download the latest 5.0 firmware from iOS Dev Center and place it in the same folder.

5.0b4 (iPad 1): iPad1,1_5.0_9A5274d_Restore

Extract the RedSn0w zip file into the same folder.
Click here to enlarge

Step Two
Connect your iPad to the computer and launch iTunes.
Click here to enlarge

Select your iPad from the list of devices on the left. Now hold down Shift and click the Restore button. Restore is preferred as it wont create any wasted space on your iPad.
Click here to enlarge

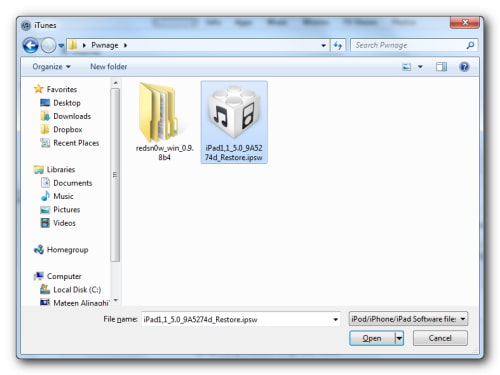
Navigate to the Pwnage folder on your desktop and select the 5.0 firmware ipsw. Click the Choose button to continue.
Click here to enlarge

Step Three
Once iTunes has finished updating your iPad to the desired firmware open the Pwnage folder on your desktop and launch the redsn0w application from the redsn0w folder we extracted earlier.

**Windows 7 users may need to run RedSn0w in Vista Compatibility mode. You can do this by right clicking the executable and selecting Properties from the contextual menu.
Click here to enlarge

Step Four
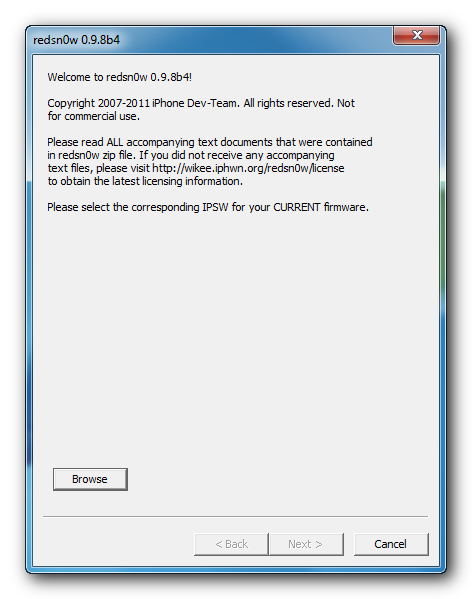
Once RedSn0w opens click the Browse button
Click here to enlarge

Step Five
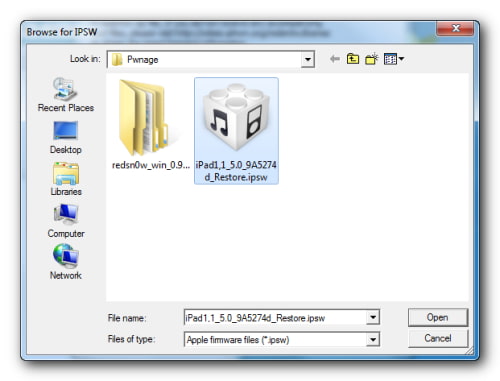
Select the 5.0 firmware ipsw we placed in the Pwnage folder on our desktop then click Open.
Click here to enlarge

Step Six
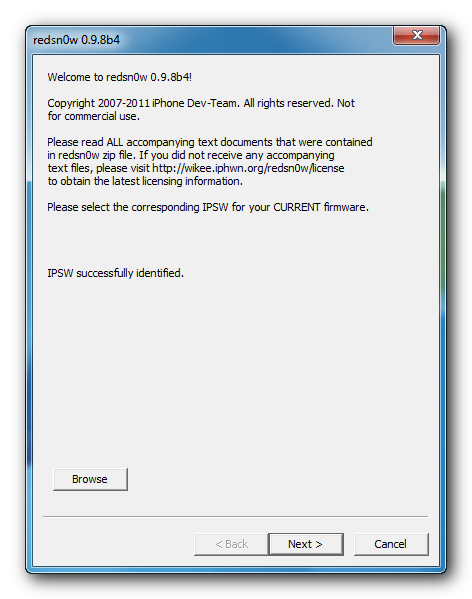
Once the firmware has been verified click the Next button to continue.
Click here to enlarge

Step Seven
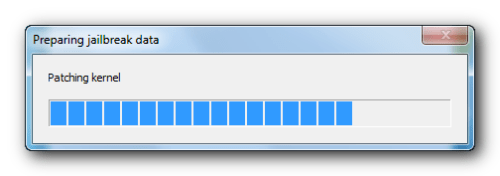
RedSn0w will now prepare the jailbreak data
Click here to enlarge

Step Eight
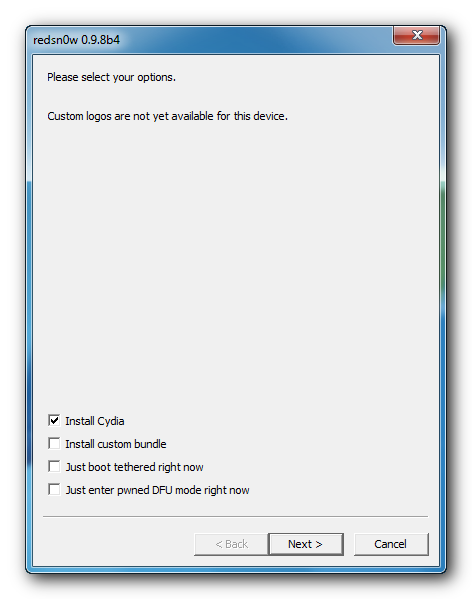
From this window you can select the jailbreak options you would like. Make sure Cydia is selected and click the Next button to continue.
Click here to enlarge

Step Nine
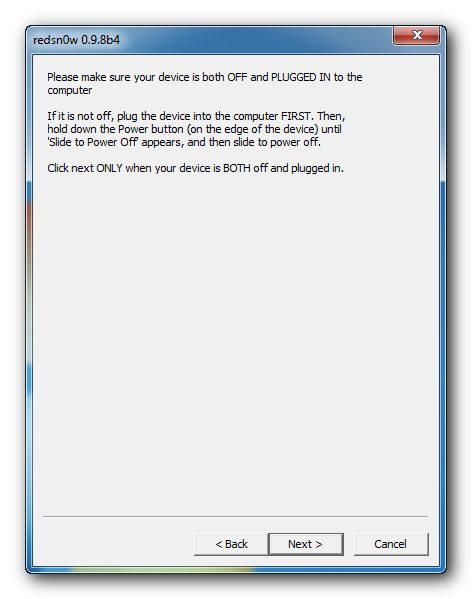
Please plug your iPad into the computer and make sure its OFF then click the Next button
Click here to enlarge

Step Ten
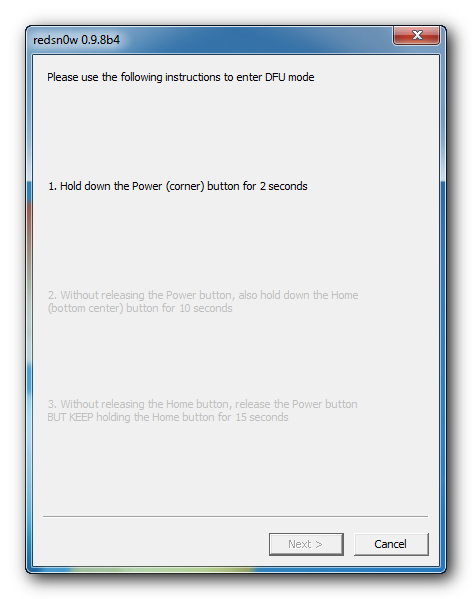
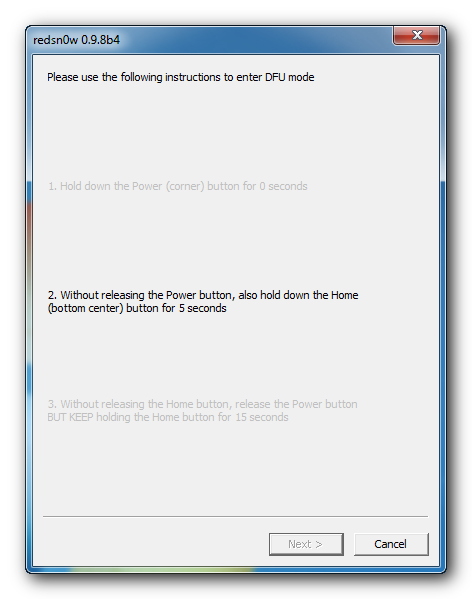
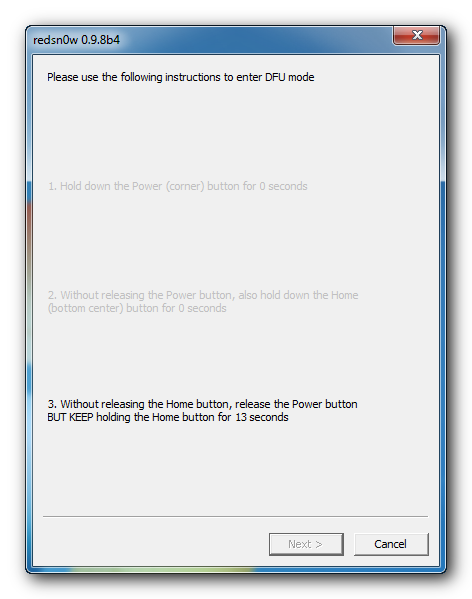
RedSn0w will now guide you through the steps to get into DFU mode. You can find more help with DFU mode here
Click here to enlarge

Hold down both the Home button and the Power button for 10 seconds.
Click here to enlarge

Release the Power button and continue holding the Home button until RedSn0w detects the device.
Click here to enlarge

Step Eleven
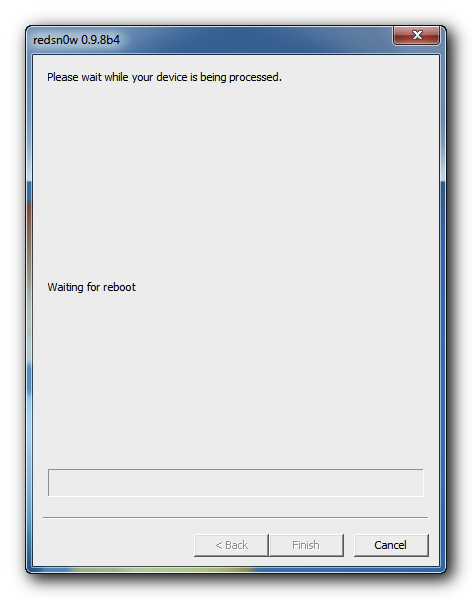
Your iPad will now reboot
Click here to enlarge

Step Twelve
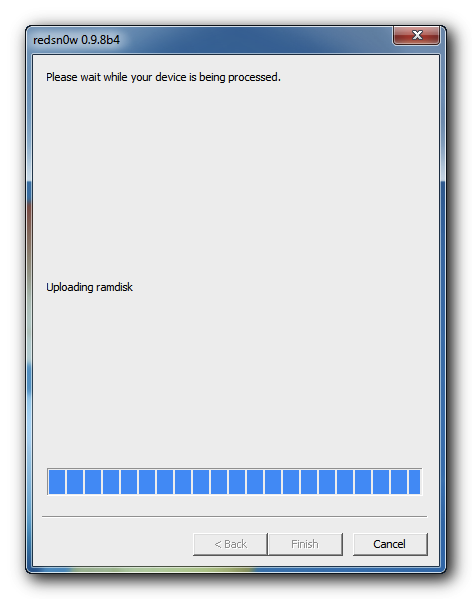
RedSn0w will then begin uploading the new RAM Disk and Kernel.
Click here to enlarge

Step Thirteen
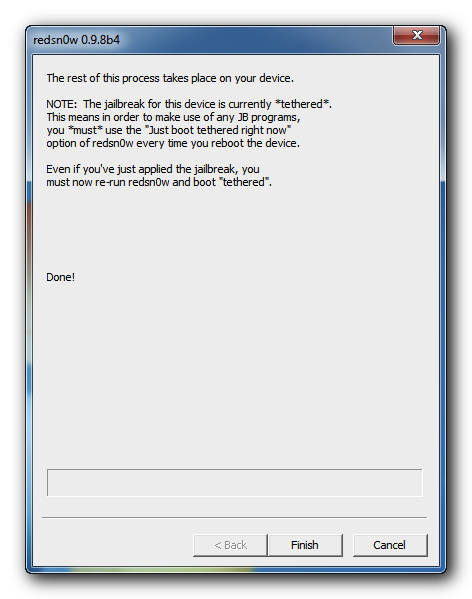
Once this is complete you will be notified that RedSn0w is done. Click the Finish button. When your iPad finishes rebooting (5 minutes or so) it will be jailbroken with Cydia on the SpringBoard.
Click here to enlarge


BOOT TETHERED:
Since this is a tethered jailbreak you must use Redsn0w to help you boot back into your jailbroken device if its powered off for any reason. Simply connect your iPad to the computer, launch RedSn0w, select Just boot tethered right now from the options window and click Next to have RedSn0w boot your device.
Click here to enlarge

*As usual a big thanks to the iPhone Dev-Team and Geohot for their hard work and contribution to the iPhone community.
**Windows 7 users can try running RedSn0w as an administrator in Windows Vista or XP compatibility mode if you experience any difficulties.
Read More..